Perspective Transformation Tool
a design for a an image manipulation feature I would like to have
Dave Yost
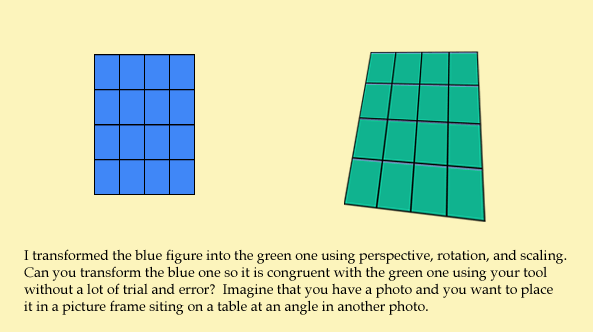
Imagine you have an image of a scene containing a perspective-distorted object (i.e., not parallel to the image plane). The object might be a picture frame on a table, a painting on a wall, or a TV screen. You may want to
- scale and perspective-distort another image so it fits perfectly into an object in the frame, for example, a picture frame
- extract the perspective-distorted object within the image and undistort it so it is a normal rectangular image
Or perhaps you want to process an image so it appears as if the camera were pointing in a different direction. For example, you may have taken a photograph of a building that is a bit taller than you could capture straight-on, so you tilted the camera up a little, and you want to make an image that looks as if you had a wider-angle lens pointed straight on to the building. (I had this situation in my Fifth Avenue poster, explained in the accompanying booklet.)
The proposed Perspective Transformation Tool has the power you need to handle these situations.
The following spec assumes that the tool is implemented in Adobe Photoshop. It is written in the style of a manual but with the extra detail necessary for a spec.
The tool has two modes of operation:
Undistorting a source image into a new rectangular destination image
In this mode, the contents of the current image window will be undistorted into a new image window.
A windoid appears with three buttons in it: Undistort, Crop, and Cancel. Three adjustable line segments forming three sides of a rectangle appear in the current image window.
Adjust the positions of the two parallel line segments so they correspond to any two lines in the image that were parallel in reality. The lines you have identified will be parallel in the destination image. Adjust the position of the perpendicular line segment so that it corresponds to a line in the image which was in reality perpendicular to the two other line segments.
Click the Undistort button. This creates a temporary image window in which a preview of the undistorted image appears. Also in the preview window is an adjustable crop rectangle. The original image data will not completely fill the preview window and will be an odd shape because of the perspective transformation.
Adjust the, position, size and aspect ratio of the crop rectangle. You can grab the image anywhere except on the crop rectangle and rotate it. You can zoom the image in and out and resize the window while performing these tasks.
Click the Crop button. This brings up a New Image dialog, in which you can select the final image size, etc. as usual. When you click OK in that dialog, the tool transforms pixels from the source image directly into pixels in the new image window with maximum fidelity.
On 2000-10-16, a product came to my attention which sort of does this part of the job.
Distorting and scaling a rectangular source image and inserting it into a destination image

In this mode, a chosen trapezoidal portion of a source image will be distorted and scaled, then inserted into a chosen quadrangle in a new layer in a destination image under a mask.
Open the source and destination images. The frontmost window will be the destination, and the previous frontmost window the source.
A windoid appears. The windoid has two buttons in it, Insert and Cancel, and two checkboxes: Square top and Square bottom (both initially checked). In the source window, an adjustable crop rectangle appears. In the destination window, an adjustable quadrangle appears. The source crop rectangle has two parallel sides and top and a bottom ends corresponding to the sides and ends of the destination quadrangle. The top and bottom ends of the source may not end up square to the sides as we shall see. The dashed lines of the ends are dashed more frequently than the dashed lines of the sides so you can tell them apart.
Adjust the corners of the destination quadrangle to match the points in the destination image where the corners of the cropped source image will go. The image area inside the destination quadrangle updates interactively to preview the result.
If the Square top and Square bottom checkboxes remain checked in the windoid, then the destination quadrangle is constrained to be an equilateral trapezoid with the top and bottom ends parallel, and the top and bottom of the source rectangle are square.
If the Square top/bottom checkbox is unchecked, then the top/bottom of the destination quadrangle can be positioned as desired, and the top/bottom of the source rectangle will be unsquare if necessary to track the shape of the destination quadrangle.
You can move, rotate, and scale the source crop area, but you can't change it's shape, which is determined by the destination quadrangle.
Click the Insert button to transform pixels from the source image directly into pixels in the new layer in the destination image.
http://Yost.com/Computers/PerspectiveTransofmationTool/ - this page
1998-04-23 Created
2000-10-16 Modified